| The work in hand is fast becoming a lost art. It can start with something as simple as asking the horse to move away from you in the stable and progresses all the way through to the airs above the ground. I have found this work incredibly useful for both horses and their handlers. Similar to the lunge work, the in hand work is best shown / taught in real life so please e-mail me at Simon to book a session. My first video shows some of the basic in-hand work leading up to some work towards the piaffe, done in the Iberian style. The work is not the culmination as he is only 6 yers old. At about 5mins into the video we can see Ted working some piaffe steps without me holding as his trust has greatly improved. Click on the link below to see me working Ted working in-hand, Iberian style. For more information about the way I worked Ted see the first article. I have now added a sequel to my first in-hand video. This shows a range of horses, starting out with the basics and progressing through to the Grand Prix work:
Working a horse in hand can be extremely rewarding. It gives the horse confidence, makes him more supple and is useful if for some reason the horse cannot have a saddle on his back. Accidents when handling horses happen all too frequently and so before you attempt to work your horse in hand make sure that you wear gloves. It is also advisable to wear a hard hat. Also make sure that your horse is not afraid of the whip and that he does not kick out. If your horse is a little whip shy then desensitize him by firstly stroking him gently all over his body with the whip so that he does not flinch and is not afraid. Make sure that your body language is not too aggressive or too passive. Always work in an enclosed area and quiet environment. I believe it is always better to have someone competent with this work to start your horse off and to put you on the right path but hopefully this article will inspire you to want to learn the basics of how to work your horse/pony in hand. |
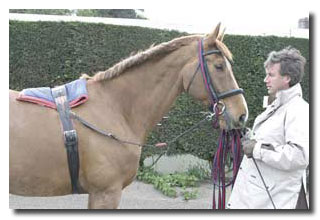 |
When working with a young horse or a horse I am not familiar with it is always better to have the lunge line attached to the cavesson as opposed to the bit. This is so that if the young horse leaps forward he does not jab himself in the mouth with the bit and become afraid of it. Here I am working with "Ollie" and therefore I know him very well and prefer to attach the lunge line from my hand through the inside bit ring following the line of the cheek piece up and over the head and clipped to the outside bit ring. Make sure that the clip is attached facing outwards! This method does mean that in order to change the rein you will have to swap the lunge line over. |
|
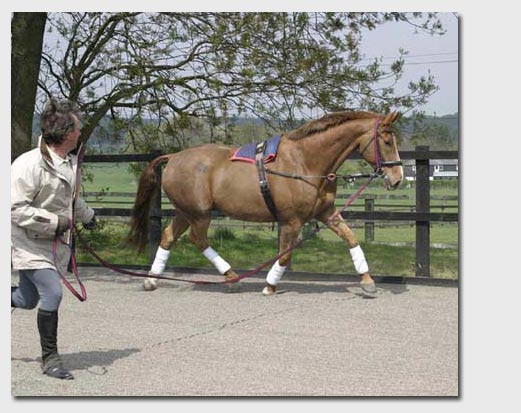
I always like to warm the horse up for either work on the lunge, double lunging or work in hand by lunging with no side reins and encouraging the horse to move forwards and to stretch down. I would normally do about five minutes on each rein depending upon freshness, temperament and include one or two transitions in this time. It is very important that you concentrate on certain aspects for both safety and technique efficiency. These would include proper use of the lunge whip, i.e. not having it tucked under your arm but following the horse with the idea of the whip representing your leg. For the warm-up lunging I have the lash of the whip free and for the in hand work I tie it neatly around the whip because you don’t want the lash to get tangled around the horse’s leg or that you end up tripping over it. Don’t wear spurs as they can also trip you up. Make sure that you hold the lunge line properly and that it is coiled safely without any twists in it in equal sensible size loops that your hands can manage. The coiled lunge line is so that this allows you to feed it out safely and gradually when lunging on the circle. One aspect I insist upon on the technical side is that when lunging on a circle the person stands still and does not let the horse drift around the arena. This enables the horse to relax his body around a circle path with great benefit. My next step is to attach side reins at a suitable length that allows the horse to seek the contact but does not fix his head into a shape. I then run through some trot walk trot transitions and maybe a canter depending upon the horse and his level of training. I feel this is important to do before the in hand work to confirm the horse’s willingness to work forwards to a contact and to click into work mode. In this phase I have the side reins on the lower ring and will later put them a little higher. To begin the in hand work I would have the horse in halt and again clarify the confidence to the whip touching all over the horse’s body. He must be calm and relaxed wherever you touch before commencing the work. Standing in the correct place beside the horse ready to move off into walk is very important. Too far near the horse’s head and the horse can shoot backwards too far near the tail and the horse could plough forwards. I like to keep my hand on the lunge line quite near the bit ring, which brings my body approximately near the slope of the shoulder; this is where you should remain. It is very important that the horse be clear with your voice commands. Moving off can either be achieved by a voice signal i.e. “walk on” or with a touch with the whip on the horse’s barrel. I believe it is important to differentiate with the whip aids between a signal to move forwards (touch on the barrel) and a signal to pick up a particular hind leg individually. Then go large around the school getting acclimatized to walking in this posture and keeping an eye on the horse’s body positioning and relaxation. Try to keep him straight and at the walk tempo that you choose not the one he chooses. Practice walk to halt and halt to walk making sure that the horse stays calm. Keep soft connections via the lunge line to the bit giving the horse every opportunity to stay in a relaxed carriage. Try not to tense up in your shoulders, elbows and forearms because if you do the horse will feel it. This will also help you with the ridden contact. |
|
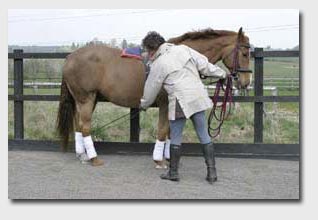
In halt you can start teaching the horse to square up by touching the whip to the hind leg that is trailing. Be careful where you stand when doing this and make sure that the horse is very relaxed with the walk halt process in itself. By tapping the hind leg the horse may want to simply walk forwards and this is where your voice command to stand needs to be affective so that the horse learns that you want a reaction from that one specific hind leg. Praise him with every little reaction even if you need to repeat two or three times before he steps up squarely behind. |
 |
|
The next step is to progress onto moving the horse laterally. As with the ridden work this must not be overdone and the emphasis is always on forwards and sideways. Take time when commencing any of this work and be happy with a few steps and build on this from day to day. The simplest exercise to start with is the leg yield. Walking alongside the horse turn down the centre line, ask the horse to look slightly towards you and invite him to move forwards and sideways in a leg yield towards the long side. It does not matter if you do not get all the way over to the track in your first few attempts. Do not force any movement and try and keep the neck straight out of the horse’s shoulders and look for a crisp reaction of the hind leg stepping away from the whip. The best time to touch the hind leg is as it is just about to leave the floor as this will encourage the maximum reaction and step forward. It is best to touch the leg at this stage between the hock and the fetlock. |
 |
In between all exercises send the horse back onto the lunge circle in trot to re-establish forwardness and that he is moving into the side-rein contact. The next exercise is a very useful one but as with all this work care and consideration must be taken. It involves walking the horse around a circle approximately 6-8 meters in diameter. Once established on the circle the handler encourages the horse to bend the neck and head slightly towards them and invites the quarters to step to a slightly bigger circle. |
The result of this is that the horse’s shoulders stay on the original circle path and the inside hind leg of the horse steps diagonally towards the outside foreleg with a result that as it touches to the floor it is underneath the centre of gravity and carries more weight. The horse will find this initially difficult and will want to either quicken to go forwards, overly bend the neck and move straight, try to push out through the outside shoulder hence negating the lateral step of the inside hind leg, swing the quarters too far out and stop to look at you or simply show a reluctance to move the hind leg by acting as if he is going through treacle. |
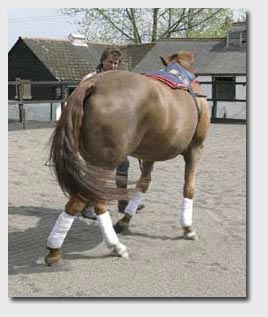 |
When done correctly it puts the horse into the outside contact, supples the shoulders and starts the process of weight transference to the hind legs. Once you can do these exercises with ease in both directions you can begin the shoulder-in. |
 |
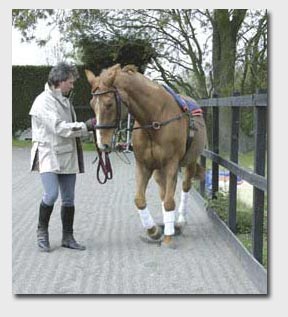 |
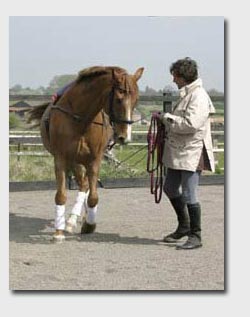
Start off walking large and as you progress onto a long side lead the horse as if you were going to start a ten meter circle and as the shoulders come off the track take a gentle check on the lunge line and touch the inside hind leg as it steps off the floor. Make sure you are aware of what is required for a shoulder-in as a lot can go wrong with this exercise. Look for correct alignment through the throat lash area, equal bend through the neck and body, and correct three track alignment and a soft ease of motion through the horse’s body. |
From here the work in hand can grow in many directions. Transitions can be improved, especially the trot to halts. Further lateral work can be commenced which will include the travers, pirouette and half pass work, the piaffe and the passage and the airs above the ground. |
